-
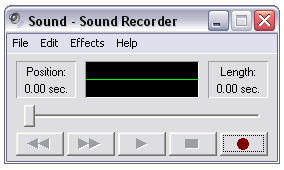
Open your sound recording software. To use Windows Sound
Recorder click:
Start > Programs >
Entertainment > Sound Recorder

-
Make sure your microphone is connected to the PC.
-
Ensure that your microphone volume is not on mute. From the
Sound Recorder program select Edit >
Audio Properties and then clicking on the "Volume"
button.
Make sure that the "Mute" option is
not checked and that Volume slider
bar is not too far down towards the bottom:

-
Next, record your name. In the main window of Sound Recorder,
click the record button:

and say your first name (not
your family name / surname) into the microphone.
Be sure to speak clearly into the microphone, saying your
name as you would in normal conversation.
Try to leave a 2 second silence on either side of your name.
-
When you are done, click the stop button:

NOTE: Sound Recorder will record
up to 60 seconds of audio. If you need more time, press
the Record button again...leave a 2 second silent pause before
continuing. Repeat until you have finished your audio
script. REMEMBER - any audio or video presentation over
5 minutes take more time to load and it loses it's effectiveness.
If your presentation requires more than 5 minutes, try chunking
the material into parts ... Part 1, Part 2, Part 3, etc.
-
Play your recording and make sure you are happy with it:

-
If you are unhappy with the recording, you will need to erase
what you have already done.
Do not just
click the record button again, this will just append the new
recording onto the end of the old recording.
Instead select File > New:

When asked whether you want to save the changes, click "No"
to start again.
You can now record a new file by clicking the record button.
-
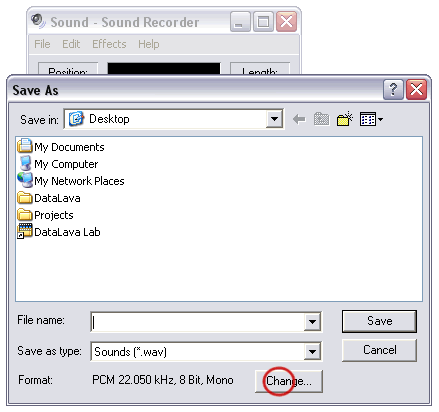
Once you are happy with the file, save the file by selecting
File > Save As.
(Make sure you select "Save As" and
not "Save").
-
We need to change the format of the recording, so click the
"Change" button:

-
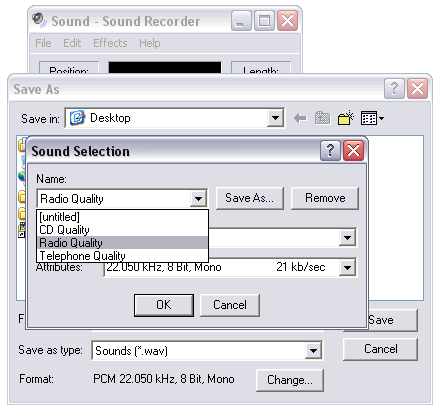
Next, select "Radio Quality" from the drop
down box and click "OK" to continue:

-
Finally, give the file a name, for example: nance.wav, and
save to a special folder on your directory. If you
are using more than one words in the file name, remember to
add an underscore between the words or no space at all, for
example: nance_wozniak.wav or nancewozniak.wav.
NO SPACES!
Find out how to upload your wav file
and add it to a PowerPoint or your Blackboard/SLN course site by
coming to the Audio Workshop on April 24th at High Noon in the TLC!